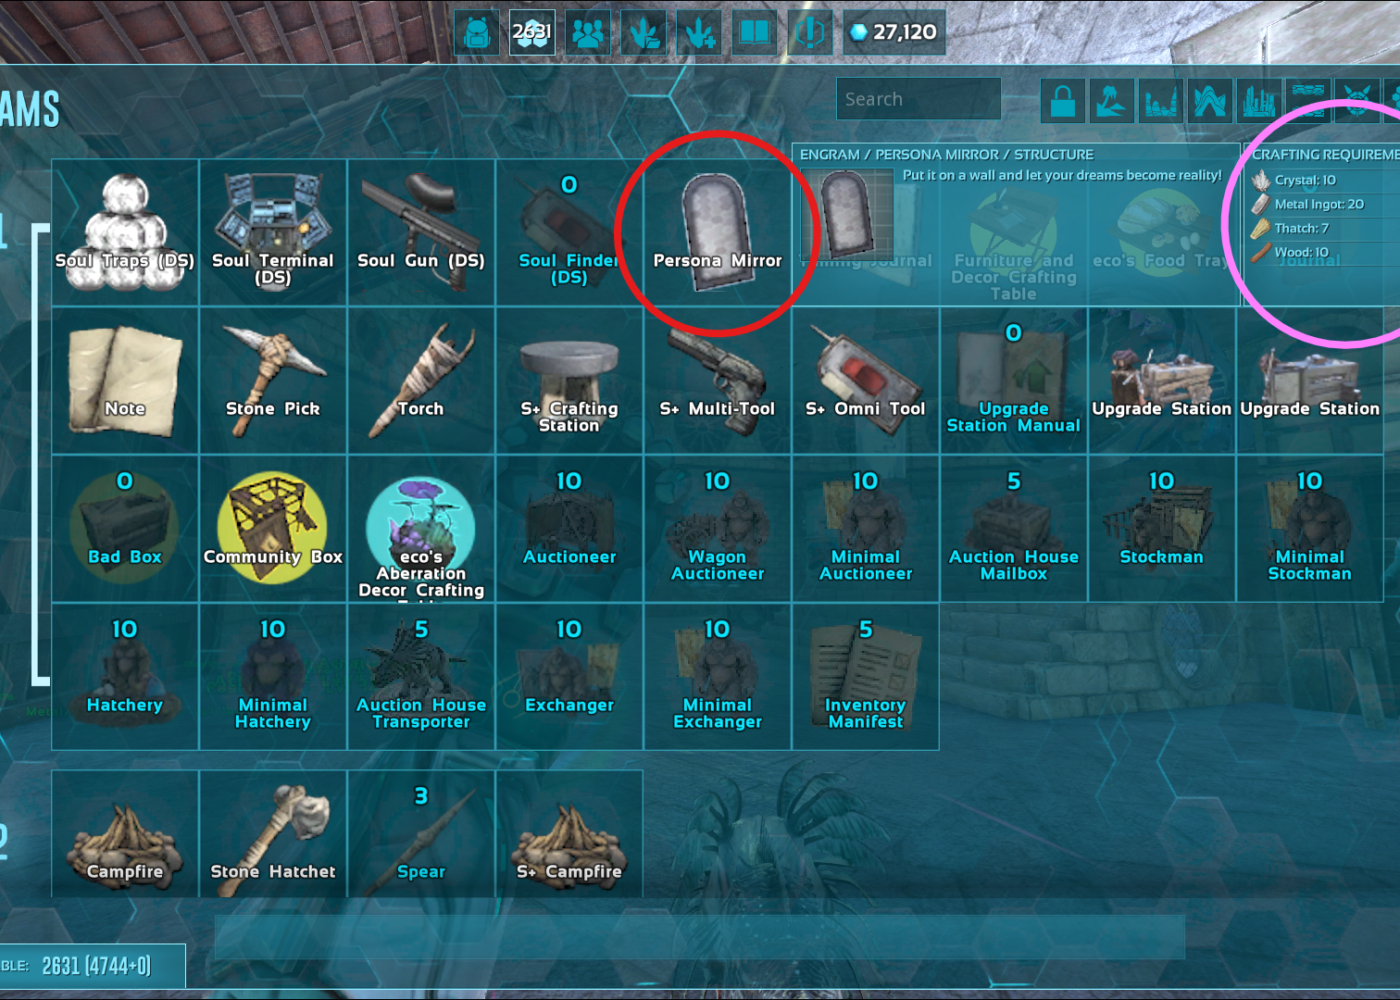
You start with learning the engram for the Persona Mirror which you can obtain at level 1 for 0 engram points, although it might differ depending on how the mod is configured.
You can then make the mirror for the steep price of 10 crystal, 20 metal ingots, 7 thatch and 10 wood. Again the requirements may differ depending on setup.
As it requires some metal ingots you might not be able to craft it right away, you may have to wait to explore the mod until you are able to make a forge and smelt some metal.
After you have crafted the mirror on yourself, you don’t need to use any crafting tables, you will have to place it on a wall, so it helps if you have a little shack or a building set up already.
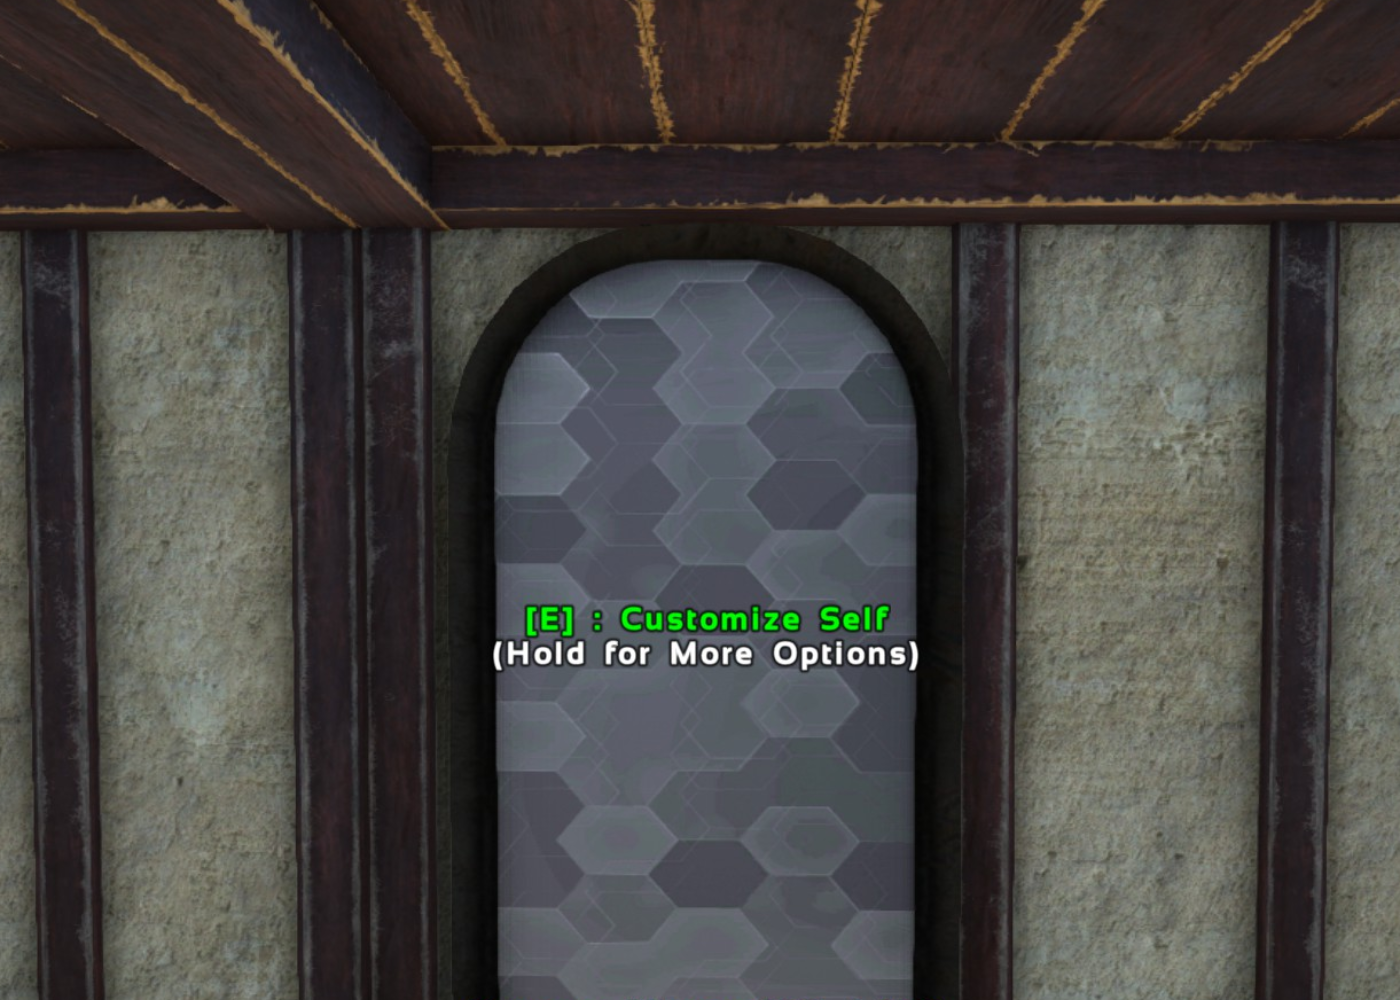
Once you stand in front of the mirror and press E to Customize Self, a whole new world of possibilities will open for you. Cosplay Evolved as of the development of this guide has 158 customisable parts you can add. That number is not about to stop with over 12 bits currently in the pipeline. Thankfully, the mod has become officially sponsored as of recently, which means we will see more additions probably faster.
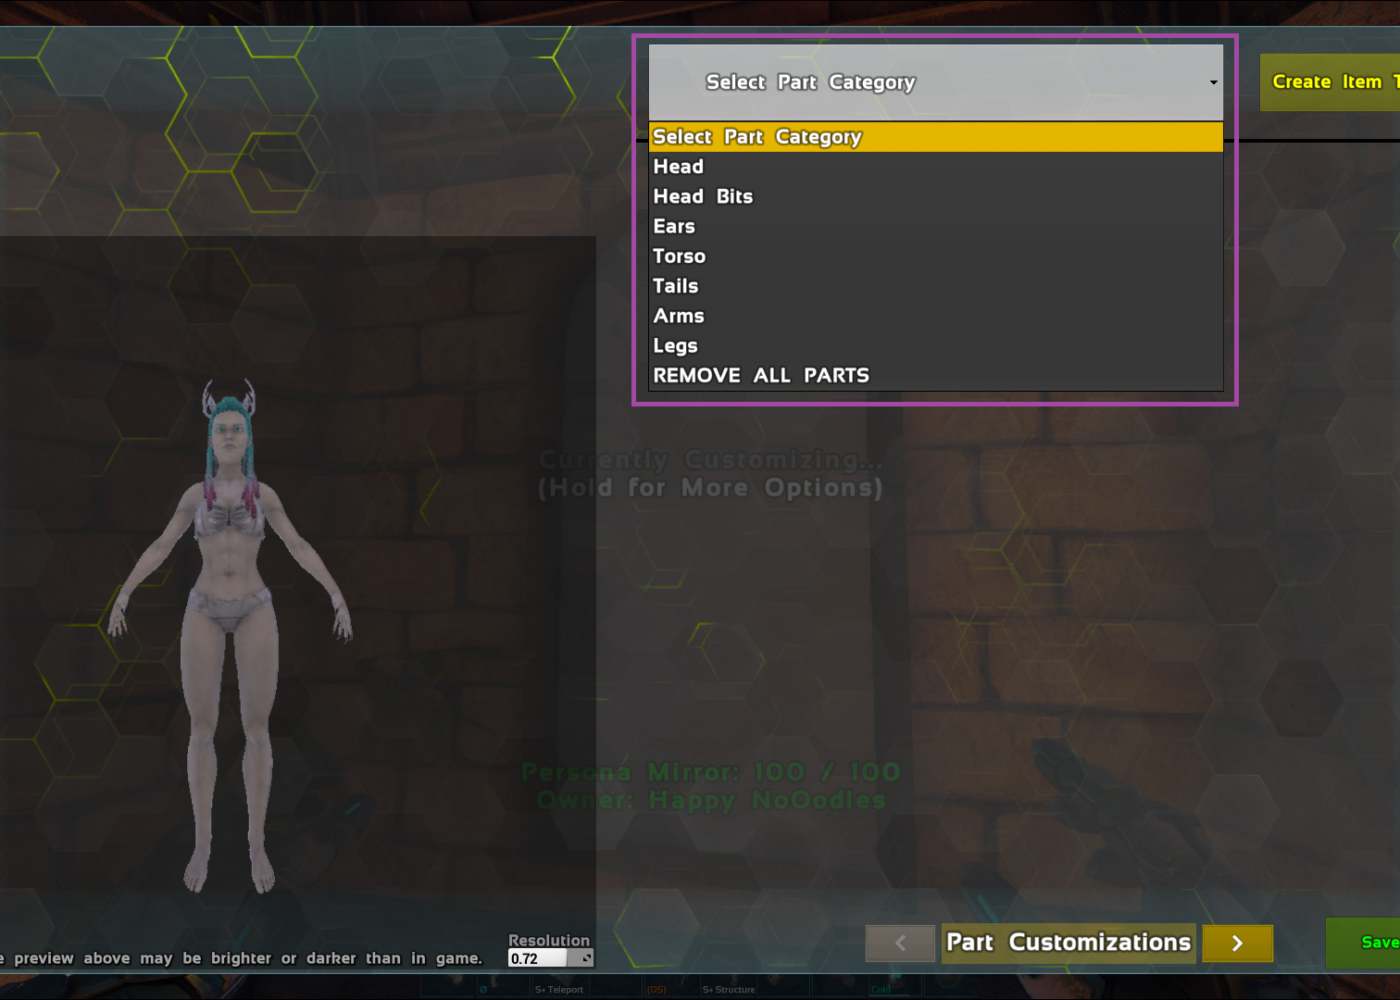
As soon as you open the mirror a menu will pop up that will show your character on the left side. You will find a drop-down option list on the right upper side from which you are able to select what body area you would like to add the particular parts. The mod author, Zarum, has provided a full parts list, however, it does not include what functionality some parts may have, but it is still a good tool to see what your options are.
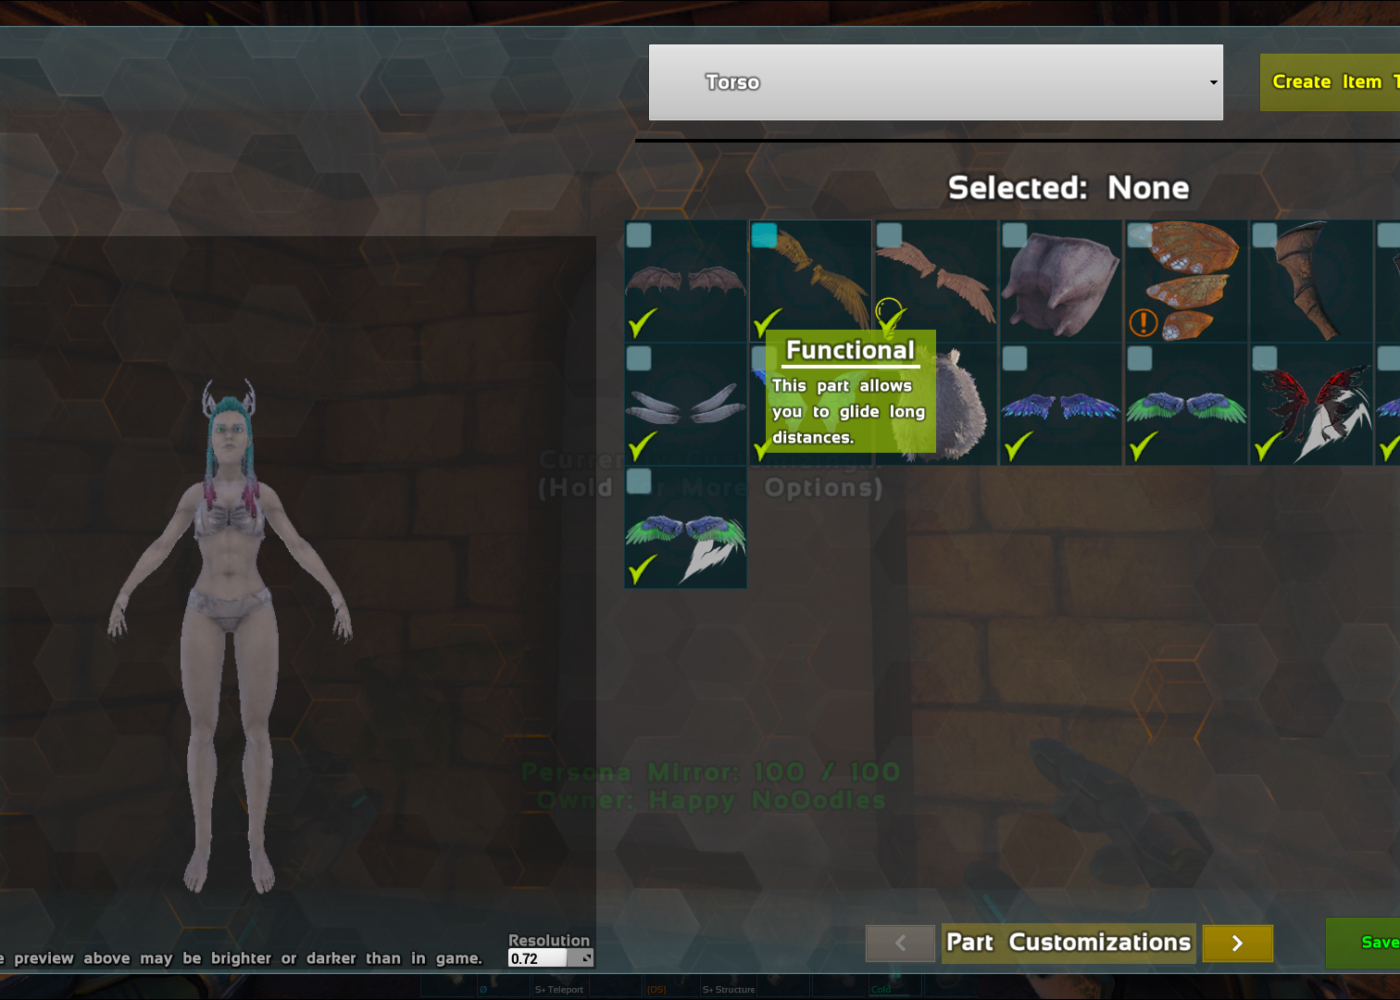
Above I mentioned functionality, which I am going to (attempt) to explain here.
Some parts have not just decorative purposes but additional functions as well. If you can utilise the part’s ability, there will be a green checkmark on it, you can hover over it with your cursor you will get a brief description of the part’s ability. However, if you are unable to use the part you can still equip it (for aesthetic purposes) and you will see an orange circle with an exclamation mark in it, if you hover over it it will tell you which engram you need to unlock in order for the part to function as intended.
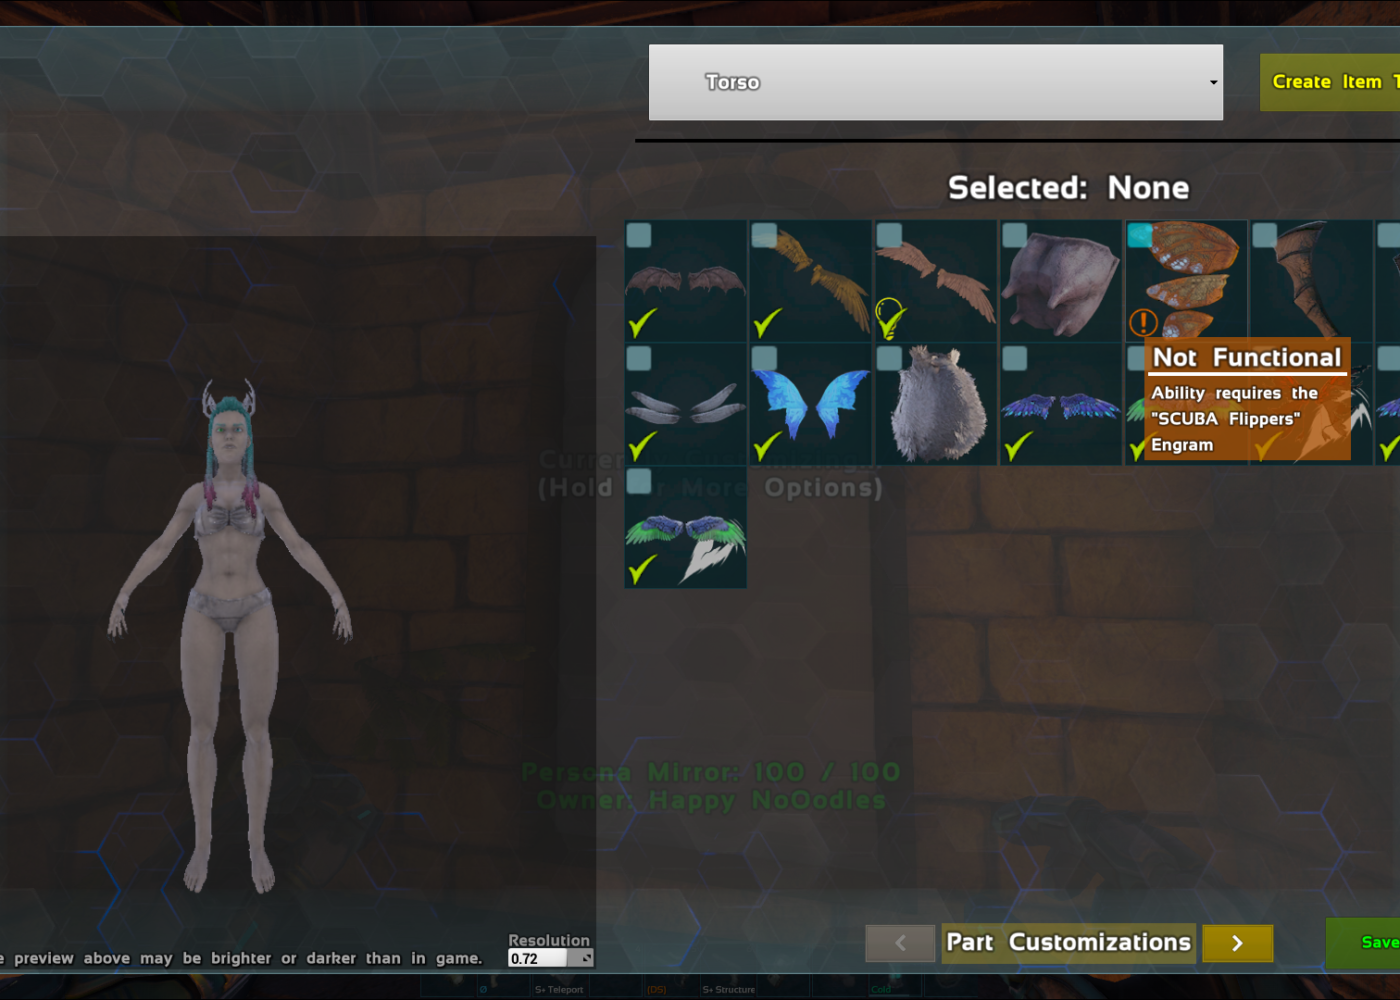
On our servers, a few of the functional parts are locked behind specific engrams:
The vampire eyes are linked to the torch which you can unlock at level 1.
The climbing claws are locked with the climbing pick engram which you can unlock at level 34.
Any of the fins are unlocked when you learn the Scuba flippers, that you can unlock at level 81.
You can make the “flywings” function by unlocking the Tek Chestpiece engram.
The left and right attack blades are linked to the Tek Sword engram.
You will also have an “Ability key” with which you can toggle the functions, it is set to “shift + R” by default but you can set it to anything on the second page of the mod menu, which you can get to by clicking the little right arrow button on the bottom of the page.
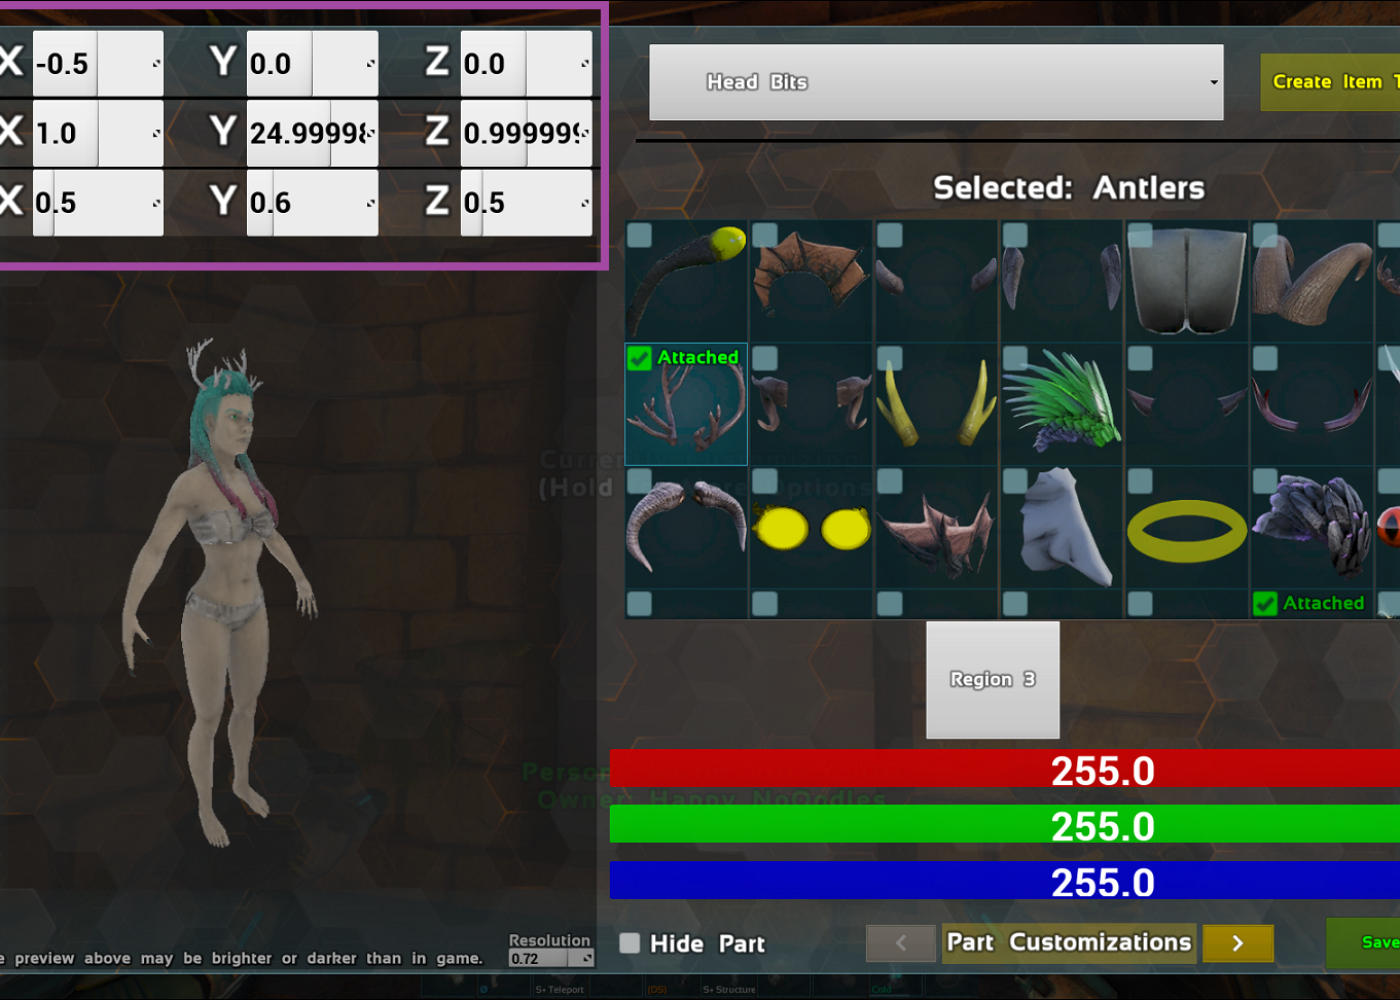
Head – You have many a head to prick from, starting with Raptors going through Snow Owls and ending with Human with customisable ear opportunities.
Head Bits – Under this, you can pick additional head features and a limited amount of functional parts such as the vampire eyes, giving you the snow owl vision or predator vision ability.
Ears – This is might be obvious, but here you can pick different ears of your liking. You have different elf ears and some fins if you want to go more of a merfolk direction.
Torso – This is where it gets interesting, you have a plethora of functional parts here with gliding wings and flying wings. You can glide slightly faster and longer with the glide wings. The fly wings will function like the Tek Chestpiece and will allow you to fly. Any part that is named fin will stabilise you in water so you will not sink.
Tails – It will not come as a surprise to you that this is the menu where you can add tail(s) to your character. The mod has most corresponding tails to heads and also some additional tails of interest. The above-mentioned fin functionality does apply to some tails as well.
Arms – This menu will allow you to add fins, feathers and spikes to your arms. You can customise your upper, lower arms, left and right separately.
Legs – Like the arms, you can get spikes, feathers, and fins to equip each leg part.
Finally, you have a “REMOVE ALL PARTS” option which will do what it says on the tin and remove all your added parts.
All of the parts are fully customisable. When you click in the tick box to add a part an additional menu will appear above your character on the left side where you can set the Location, Scale and Rotation of the added parts. You can either type your desired number in the box or use the slider to adjust. My advice would be to experiment with this and see what each setting does so you can set it to be to your liking.
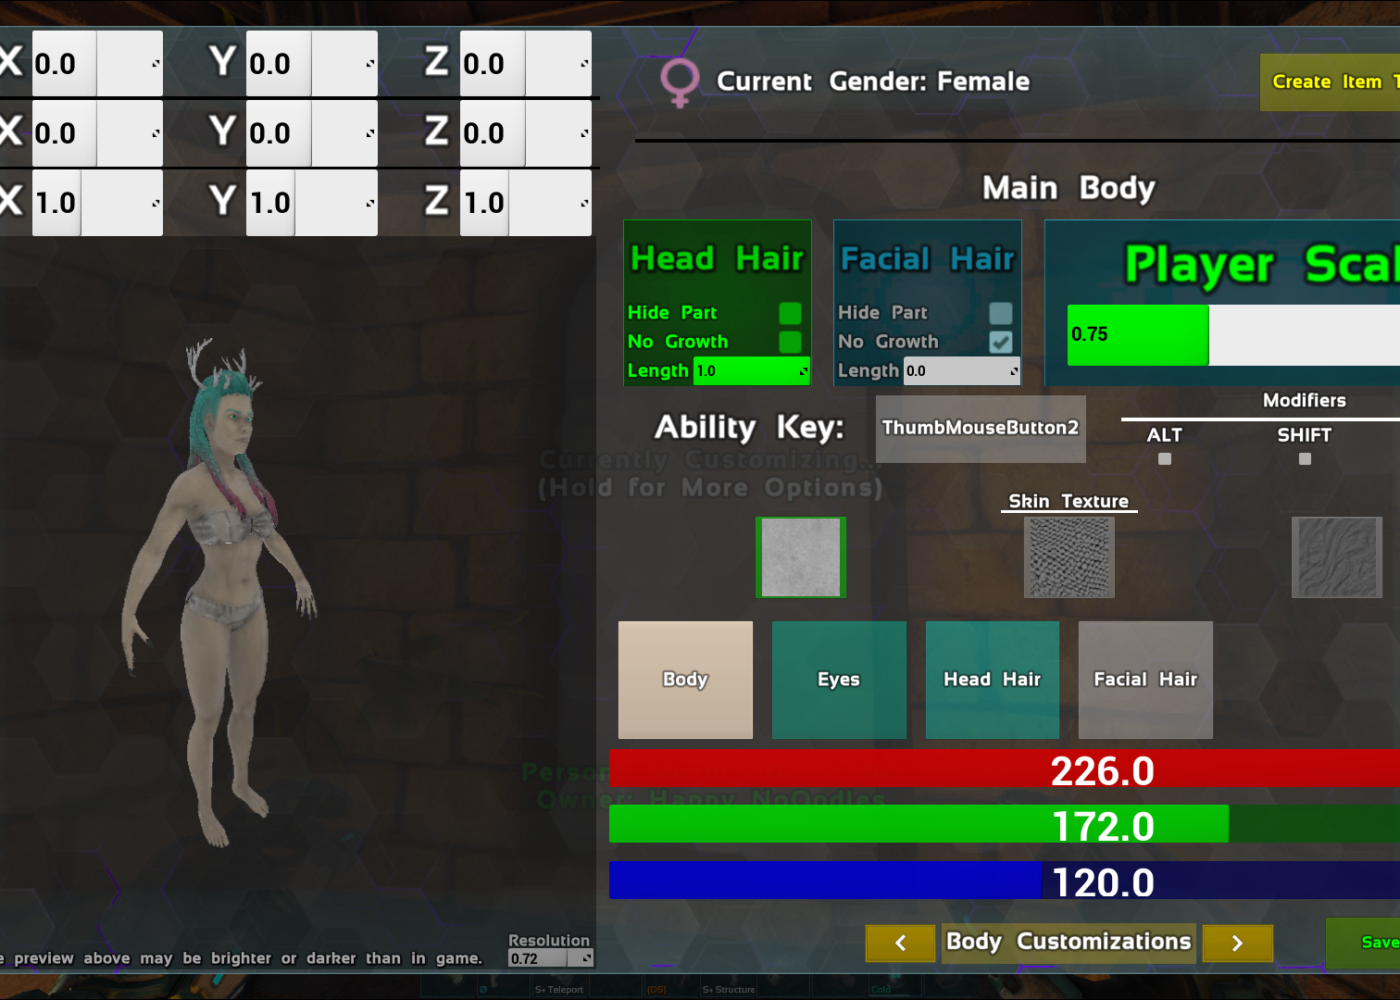
When you are done with your bits, you can move on to the next page on the bottom with the arrows. Here you can customise your body, you can set skin types such as scales or fur. If you want to go the “vanilla with sprinkles” route and want to keep your human skin I would advise googling a good skin tone and going one darker than what you would choose as the mirror does have a slight tendency to unknowingly dip you into bleach. Here you are also able to change gender or set your character scale, it is 1 by default, but you can go higher to be a bit of a giant or lower to be tiny. Just keep in mind that this will change your hitbox as well respectively.
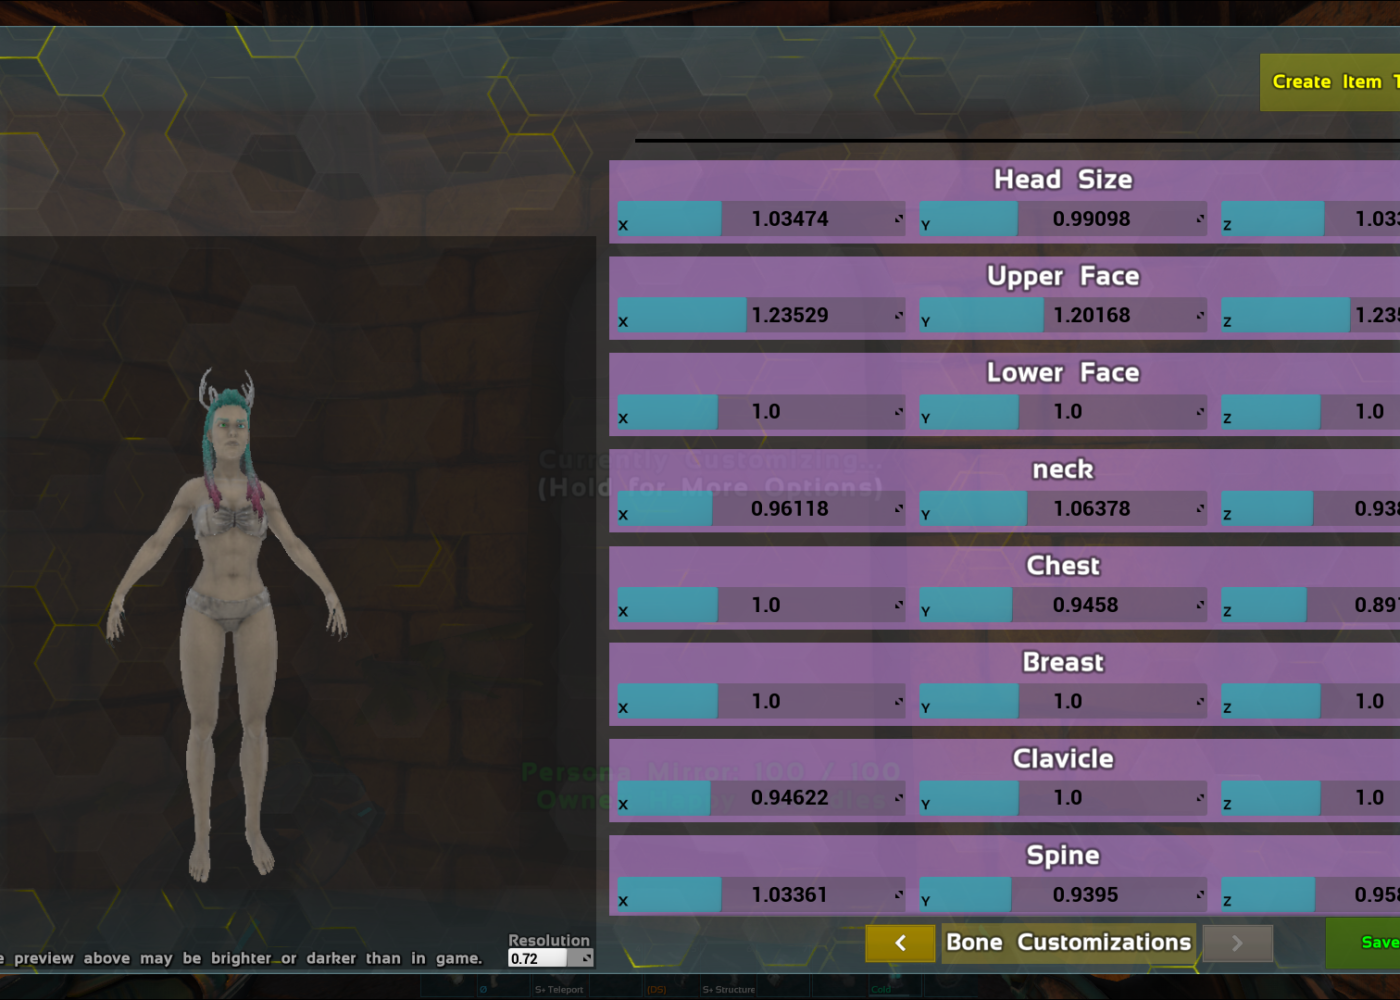
The last page for your customisation pleasure is for your bones. Once again please pus the litter right arrow on the bottom of the Body Customization page to get here. You have a plethora of options so you can just experiment to your heart’s content.
The best part is? All of your settings will save onto a file so you will never lose your parts even if you die and respawn!
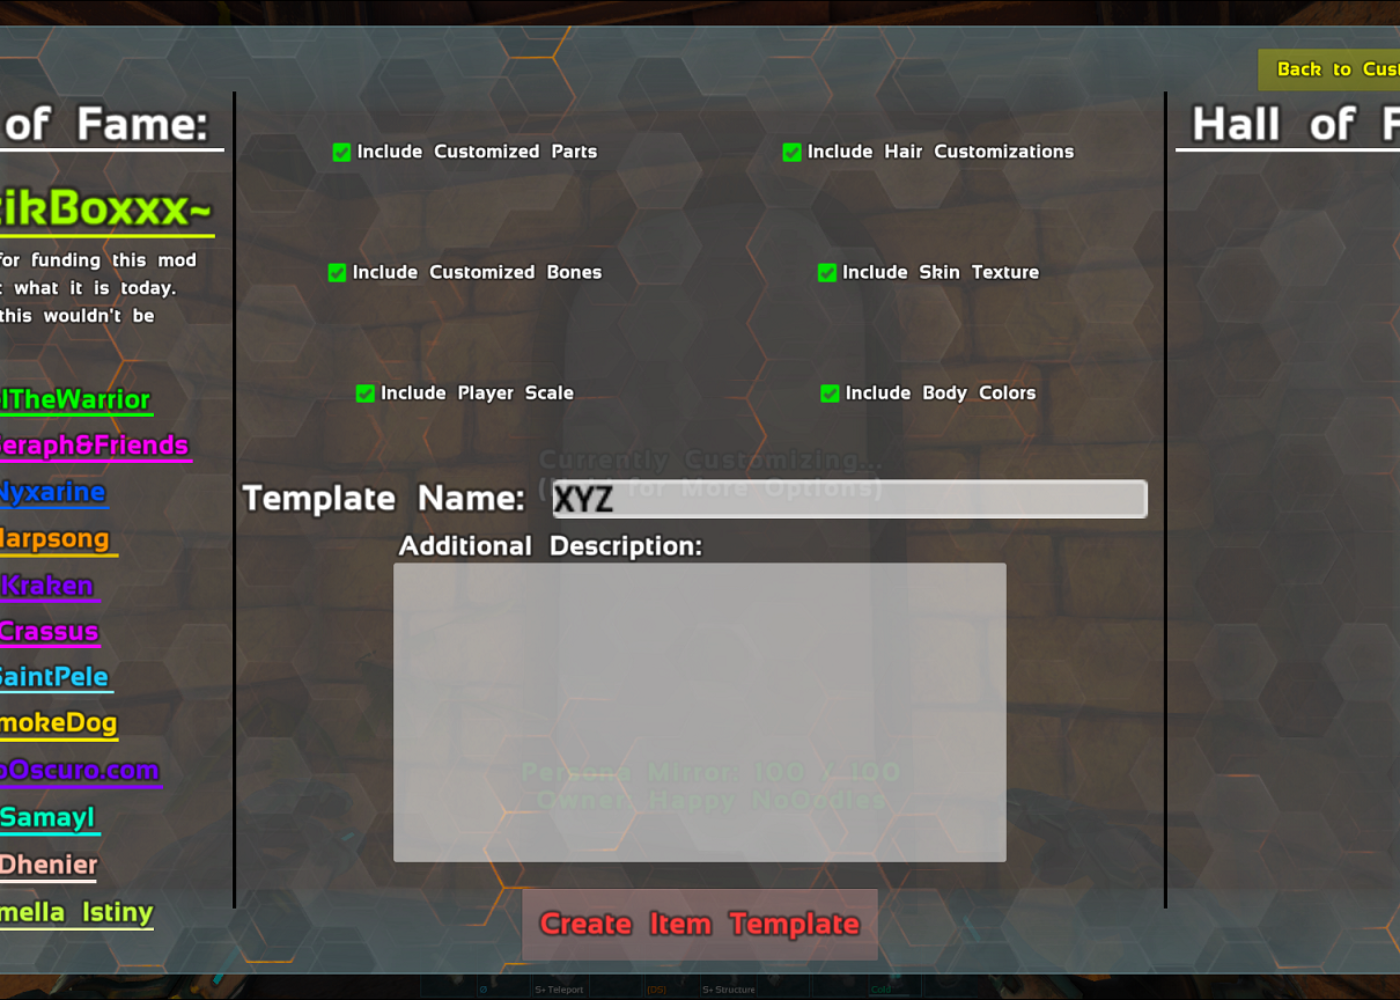
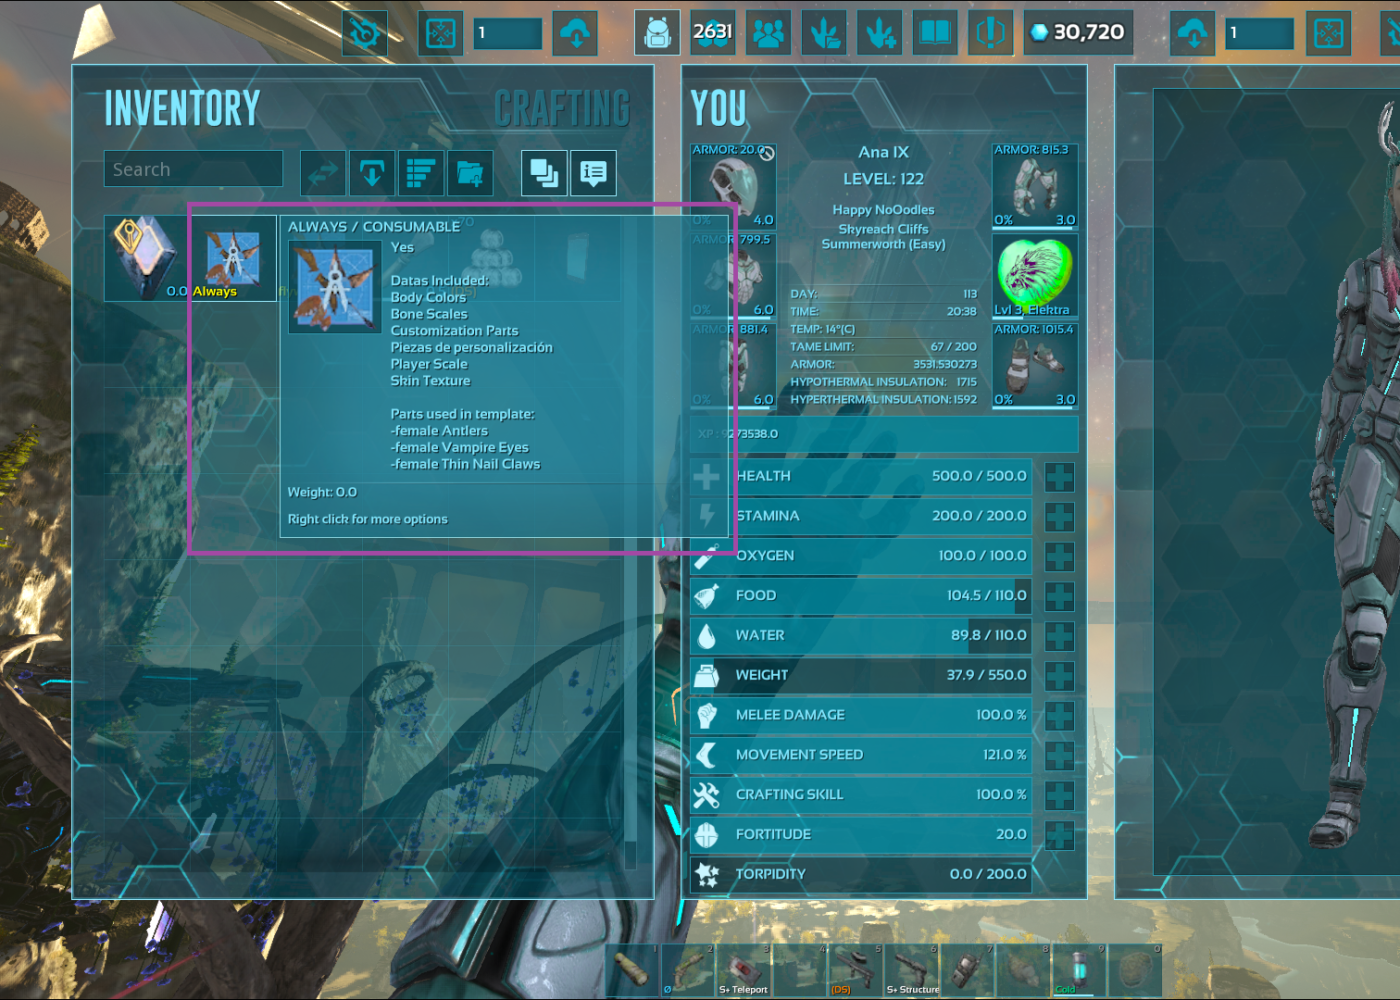
You can also make templates if you would like to change your skin or make it suited for different types of adventures or play styles. In the upper right corner, you will see a “Create Item Template” button, this will take you to the template creation page where you can name and give a brief description of your template. You are also able to set what it should include.
This is all I have for this mod. It is pretty simple, but it does require some experimentation if you want to get it just perfect for you. It is definitely the mod you need if you ever wanted more character uniqueness from Ark. For visual learners Zarum has also made a video guide, that you can watch at your own convenience and leisure, however, it is slightly outdated with all the recent updates.
